Tag Archives: sauce

Creamy Garlic Jalapeño Sauce

Nothing causes me more dread than going to the DMV in a new state to change my car registration and driver’s license. I’ve only done it 3 times, but I hate it so much I once waited until my previous registration had expired and I got a ticket before finally making the trip. I’d rather go to the dentist than the DMV any day of the week. Here in Texas though, that feeling of dread only doubled because instead of going to the DMV, you have to go to the County Tax Assessors and the Department of Public Safety. Who created this ridiculous process of needing to visit 2 agencies to finalize residnecy, made all the more difficult when neither is open on the after 5pm or on the weekend?! How does the state expect a new resident, who probably has no vacation time yet, to get your car registered within 30 days when they can only go during work hours! Clearly, this was not a task I was looking forward to completing.

Lucky for me, my new company’s leave policies are pretty generous, and I was able to use a vacation day within a month of starting. So I took Friday off, woke up at 6, and was in line at the County Tax Assessor’s  office 10 minutes before it opened – sans coffee or breakfast. Despite the byzantine process required for residency, I was in and out of both offices by 8:30, under an hour. I was amazed at the speed and efficiency of the individuals who helped me. Pleasantly surprised, I decided to celebrate my success, and fill my growling tummy, with breakfast tacos – like the real Austinite I had just become.

I stopped at Taco Deli on the way home and ordered the Otto and the Jess Special tacos. While waiting, I collected several salsas from the bar, including something they called Doña sauce, a bright green creamy sauce. Back at home, I liberally spread the jalepeño-based sauce on my taco, took a bite, and added more sauce. This stuff was amazing, addictive even, and I knew I needed to put it on everything in site. I only had a small container full, and needed to figure out how to get more. Raiding Taco Deli seemed ill advised, so I clearly needed to recreate it at home.

The sauce is a deceptively simple combination of  jalepeños and garlic, oil, and salt and pepper. Similar recipes boiled the peppers and left the garlic raw, but I was nervous about the over powering flavor of raw garlic, so I decided to roast the them together and pureed them until smooth- although next time I might try smoking them with mesquite wood for a deeper flavor. It’s an easy, straight-forward recipe that leaves plenty of room for additional creativity for those so inclined.

Jalepeno Cream Sauce - cream sauce on tacos one

Creamy Garlic Jalapeño Sauce

1 pound jalapeños
2 heads of garlic
⅓ cup virgin olive oil
salt & pepper

1)     Place a large cast iron pan or griddle in the oven and pre-heat to 325ºF. While the oven pre-heats, separate the garlic, leaving the thin papery cover on the cloves. You’ll need about 12 large and x-large cloves of garlic. Any cloves that are too small will burn and be unusable.

2)     Toss the garlic cloves and jalapeños with a drizzle of olive oil and put in the oven on the pre-heated cast iron. Roast for about 40-45 minutes until the garlic and jalapeños are soft. Stir at ⅓ and ⅔ of the way through.

Jalepeno Cream Sauce - place the peppers & garlic in a pan

Jalepeno Cream Sauce - stir half way through roasting

3)     Once the garlic and jalapeños have finished roasting, place them into plastic container or plastic bag and seal tightly. Let sit for 15-20 minutes, until everything is cool enough to handle.

Jalepeno Cream Sauce - finished roasting

4)     Carefully remove the skin from the jalapeños. Slice the skinless jalapeño open and scrape out the seeds. Toss the seeded and skinned jalapeños into a blender or food processor with the peeled roasted garlic cloves.

Jalepeno Cream Sauce - puree garlic and peppers

5)     Turn on the blender on puree and slowly drizzle the oil into the blender, add about a 1½ teaspoons of salt and a teaspoon of black pepper and blend for an addition 30 seconds.

Jalepeno Cream Sauce - season with salt and pepper

6)      Once the sauce is complete, you can store it in the fridge in a squeeze bottle for months – if you don’t finish it first. It is wonderful on fried avocados, baked salmon, nachos, and – of course – tacos, like Ruth’s shrimp tacos. Shake vigorously between uses, as minor separation may occur.

Jalepeno Cream Sauce - store in a squeeze bottle in the fridge

Jalepeno Cream Sauce - cream sauce on tacos 2

Lets Get Saucy: Roasted Veggies with Horseradish Buerre Blanc

I am tired of being cold. There I said it. Yesterday was the first day of spring, yet last Sunday saw 4 inches of snow dumped on DC and we are expecting another winter event next week. I think what bothers me the most is the teasing – just days before the last snow storm it was in the 70s here and I was walking to the bus stop in the morning wearing a dress and cardigan. Mother nature, YOU ARE DRUNK, go home!!!!

Despite all the snow and horrible wind-chills, there is one sure sign that spring may really be on its way. Weekly asparagus sales at grocery store. It doesn’t matter if its fat or thin, if its on sale, I’m buying it – and probably devouring it within a couple of days. Although, the way I devour it will differ depending on the girth of the stalks. Thin, spindly stalks are great for stir-fry, quiches, and risotto because it cooks quickly; while the thicker stalks stand up better to roasting and grilling.

The asparagus season coincided with me finally perfecting burre blanc sauce. A deceptively simple mix of white wine, an acid (vinegar or lemon), and butter, it can go from perfect creaminess to a mess in a matter of seconds. After lots of practice though (and maybe a bit of wasted butter), I can whip up a simple buerre blanc without thinking about it. It does have to be used all at once, as reheating it leaves with an oily separated liquid, so I still only pull it out for full meals and dinner parties, and not for many meals for one. I like to whisk in a bit of horseradish at the end, giving the sauce a fresh bite at the end.

Roasted Veggies with Horseradish Buerre Blanc

Roasted Veggies with Buerre Blanc 1

1 bunch “fat” asparagus
1 bag frozen artichoke heart quarters
8 ounces baby bella mushrooms
olive oil
salt & pepper

Horseradish Buerre Blanc
¼ cup dry white wine
3 tbsp white wine vinegar
1 large clove garlic, finely minced
½ cup butter, cubed and chilled
1 tbsp prepared horseradish

1)     Pre-heat oven to 375ºF. Place frozen artichokes in a bowl of warm (not hot) water) to defrost. Once they have mostly defrosted, drain well, squeezing very gently to remove some extra water.

2)     Wash mushrooms and cut into quarter (for medium mushrooms) or sixths (for larger mushrooms). Place in a large bowl. Trim asparagus and cut into 1 inch pieces and add to the bowl with the mushrooms. Give your artichokes one last shake to remove water and toss with the asparagus and mushrooms.

Roasted Veggies with Buerre Blanc - prepped veggies

Veggies before I defrosted the artichokes…

3)     Drizzle vegetables with a tablespoon to 2 tablespoons of olive oil and toss to coat. Season with salt and pepper. Pour into a 9×13-inch casserole pan. Roast for about 30-40 minutes, until the leaves of the artichoke start to crisp.

4)     While the vegetables roast: In a small sauce pan, combine white wine, vinegar, and garlic. Bring to a simmer over medium heat and cook until the liquid has reduced by a little more than half (about 2-3 tablespoons of liquid remaining).

Roasted Veggies with Buerre Blanc - simmer wine and garlic

5)     Reduce the heat to low and begin whisking in the chilled cubed butter a piece or two at a time. In order to create a perfect creamy beurre blanc, the butter must melt slowly into the sauce. Generally, the constant addition of cold butter should keep the sauce from heating too quickly; if the butter does appear to be melting too fast, remove the pan from the heat source for a few moments while continuing to whisk vigorously.

Roasted Veggies with Buerre Blanc - finished buerre blanc

6)     Whisk in 1 tablespoon prepared horseradish and serve immediately.

Mojo Verde, A Spanish “Green Sauce”

Mojo Verde Served PotatoesHere is a fun and fresh condiment to serve this summer. Mojo Verde, or “green sauce”, is a garlicky, fresh herb based sauce originating in the Canary Islands of Spain. It is a common element of traditional Spanish tapas, particularly with “baby” potatoes. Let me tell you, though, this stuff goes with everything! Recipes vary among combinations of parsley, cilantro, and mint. If you have a bumper crop of herbs growing or, if you’re like me and don’t want to waste your grocery store bunches that never seem to survive longer than a week, this pop in the freezer for later recipe is perfect.

That is exactly how I came about to making this sauce. Even after using up about half of a huge bushy bunch of cilantro (why are they always so huge???) I Mojo Verde Cilantro Leavesstill had about four cups left that was starting to yellow. With furloughs coming (as if daily sequestration “what if” drills weren’t bad enough!) , I was in quite the mood to not let anything go to waste. I knew chopping up herbs and pouring them into ice cube trays were a common trick, though I had never done it before. I thought, well while I’m at it, why not make a sauce? That would help cut prep and cooking time during those crucial and precious few post workday hours. As cilantro is a common element in my two top favorite to make cuisines (Asian and Latin), a Mojo Verde was the perfect fit for my dilemma.

Folks, this is just too easy to make. Basically, just throw everything into a food processor or chopper…even a stick blender works! Then pour any portion you are not using that day into ice cube trays. The longest part is the clean up! As I said, this sauce goes with everything.

Here are some idea that I have used this Mojo Verde with:

  • Alone as a dip served with tortilla chips
  • In a traditional potato tapas
  • Tossed a few frozen cubes into a bouillabaisse as the broth base
  • In salad dressings
  • Over grilled steak and salmon
  • Spread inside a warm, lamb pita (probably go awesome with my lamb burgers, too!)

Mojo Verde Served Tortilla Chips

See? Lots to do with the simple and easy to make sauce. Enjoy!

Mojo Verde

makes about 1/2 cup of sauce
Ingredients

Mojo Verde Ingredients

  • 2 cups tightly packed cilantro, leaves and tender stems (not the thick stems of the lower half of the plant)
  • 4-5 cloves garlic
  • 1-2 tablespoons fresh lime juice
  • 1/4 cup extra virgin olive oil
  • 1 tablespoon Sapore Tropical Spice vinegar (can substitute using white wine vinegar and a little bit of fresh chiles)
  • 1/4 tsp honey
  • pinch of kosher salt
Directions

You can use either a food processor or a stick blender.

  1. Add cilantro, garlic, and lime juice in the food processor bowl or a tall, thick walled container. If you are using the Tropical Spice Vinegar substitute, add your chile peppers here. Pulse to break down the ingredients into a chunky mixture.Mojo Verde Stuffing Food Processor
  2. Now add vinegar, olive oil, and salt and blend until a sauce forms. It will be a thick “watery” sauce, like your favorite salsa, not creamy.Mojo Verde All Saucey
  3. Add honey, and pulse until incorporated.
  4. Taste, and season with salt, and additional honey or lime juice according to your taste buds.
  5. For any portion you are not using within the next two days, spoon into ice cube trays and freeze for another day.Mojo Verde Ice Cube Trays

Purple Cauliflower and Potato Gratin – Cheesy Goodness On A Snowed In Day

Purple Cauliflower Potato Gratin 3I am debating whether to change the title of this post to Purple Cauliflower and Potato Gratin – Deliciously Cheesy But Not Quite Worth My Finger.  Or maybe I should post about sharp blade based kitchen accidents instead? Yikes! You see, this past Wednesday, our area was hit by the “snowquester”, the last (only?) big snow of the season.  It was predicted to be as big as “snowmageddon” that hit back in 2010 (now that was a snow storm!). Not even close, but still enough to keep me in for the day.  What a day to make something super creamy and cheesy, right? I decided I wanted a potato gratin and (inspired by my soon to come furlough notice)  decided I would toss in some not quite fresh but not yet spoiled purple cauliflower.  What a pretty color contrast!

Unfortunately another color almost got mixed in: red.  Even with caution, Purple Cauliflower Potato Gratin 6kitchen accidents happen.  Mandolin slicers are perfect for getting uniform potato slices. They are also quite wicked when they come in contact with your finger(s)! Ow, is an understatement to say the least.  Luckily I only lost a little chunk off the tip of my index finger.  After a few hours of applied pressure, though, I was able to finish my giant dish of cheesy, creamy comfort food for dinner.

Like I said, this dish is pretty darn delicious…but it’s not worth your finger! Have a care, my friends!

Purple Cauliflower and Potato Gratin

Serves 6-8
Ingredients

Purple Cauliflower Potato Gratin Ingredients

  • 1 head  purple cauliflower cut into florets, appx 1 pound
  • 2 large potatoes, peeled and sliced into thin rounds, appx 2 pounds
  • 1 shallot, diced or minced finely
  • 2 garlic cloves, minced
  • 6 tablespoons butter
  • 1/4 cup all-purpose flour
  • 2 cups whole milk
  • 2 cups divided shredded cheese, such as extra-sharp Cheddar, Parmesan, or Gruyere
  • 1/8 teaspoon ground nutmeg
  • 1/2 cup bread crumbs
  • 2 tablespoons chopped fresh flat-leaf parsley
  • 1 tablespoon olive oil, plus additional for greasing dish
  • kosher salt and black pepper
Directions
  1. Preheat oven to 375° Fahrenheit.  Grease baking dish with olive oil and set aside.
  2. Melt 2 tablespoons butter and 1 tablespoon olive oil in a large pan over medium high heat.  Sauté shallot and garlic until fragrant.Purple Cauliflower Potato Gratin Garlic and Shallots
  3. Add potatoes.  Cook potatoes for about 3-4 minutes, then flip and cook another 3-4 minutes.  This step helps get the potatoes cooking and infuses them with flavor. Remove from pan and set aside.Purple Cauliflower Potato Gratin Cooking Potatoes
  4. If needed, add additional butter to the pan. When melted, add cauliflower florets and cook until begin to brown. Remove from pan and set aside.Purple Cauliflower Potato Gratin Adding Cauliflower
  5.  Melt 4 tablespoons of butter over medium heat then whisk in flour.  Cook, stirring, for 2-3 minutes. Purple Cauliflower Potato Gratin Making Roux
  6. Slowly whisk milk with the roux. Bring to a low boil then reduce heat. Allow to sauce to simmer and thicken, about 8 minutes. Purple Cauliflower Potato Gratin Adding Milk to Roux
  7. When sauce has thickened, season with nutmeg, salt, and pepper.  Begin to whisk in 1 ½ cups grated cheese, continuing until cheese is melted. Remove from heat.
  8. Purple Cauliflower Potato Gratin Cheese Sauce Cover bottom of baking dish with some of the cheese sauce.  Layer potatoes, followed by cauliflower, and  grated cheese. Repeat until all ingredients have been utilized.  
    Purple Cauliflower Potato Gratin Adding Cheese Sauce to Dish  Purple Cauliflower Potato Gratin Layering Gratin
  9. In a small bowl, mix bread crumbs with parsley, 1 tablespoon olive oil.  Season the  breadcrumb topping with salt and pepper. Sprinkle over the cauliflower and potatoes and bake until golden brown and bubbling, 25-30 minutes.Purple Cauliflower Potato Gratin Cheesy Melty Dish

Savory Pumpkin Sauce and Lunch at the Market Table Bistro

So you’ve read about the Virginia Crush Bus wine tour and you’ve seen the tasting notes covering the 28 wines we experienced that day. Now it’s time to talk about the food! I had been debating making a pumpkin sauce for a while. It’s not often that you find savory pumpkin dishes, except maybe a soup or a chili here and there and on a rare occasion a risotto. After tasting a delicious butternut squash pasta at our Crush Bus lunch stop, the Market Table Bistro, I knew my pumpkin sauce was just around the corner.

After wrapping up at Tarara Winery, the Crush Bus whisked us away to Lovettsville, a little town in Loudoun County not far from the Maryland and West Virginia state borders. In the historic area of town, you will find the Market Table Bistro, a farm-to-table dining experience co-owned by Chef Jason Lage and his partner Rebecca Dudley. The casual environment blends well with the surrounding, rural areas and lends a focus to the very heart of the experience the owners wish to bring to their customers: fresh, locally resourced, quality cuisine.

For the Crush Bus, Chef Lage prepared a butternut squash pasta with fall mushrooms. O…M…G! What a feast for the eyes, taste buds, and belly! I was thinking the pasta would be something like ravioli stuffed with butternut squash and portabellas. Nope! Homemade pappardelle pasta so soft and tender; three or four different kinds of mushrooms I had never seen before; and a creamy butternut squash sauce. I am so not a vegetarian and very rarely go “meatless”, but this dish was so completely satisfying and delicious that it wasn’t until we were on our way to Hiddencroft that I realized I had had a vegetarian lunch!

Today I am sharing a dish similar to the pasta dish we had at Market Table Bistro,  but with pumpkin instead of butternut squash, and not as farm fresh with store bought pasta sheets and shitake mushrooms (I’m pretty sure there was probably truffle oil in the original dish, as well!).  This is one multi-tasking sauce! I dressed up grilled pork chops and roasted chicken with the leftover sauce, which gives it a thumbs up from me as a wonderful and healthy substitute for turkey gravy at your Thanksgiving table. It also went deliciously with goat cheese tortellini and I think I am going to make pumpkin enchiladas with next week’s Thanksgiving leftovers!

Savory Pumpkin Sauce

makes appx 2 cups of sauce
Ingredients
  • 1 15 ounce can pumpkin puree
  • 1 small shallot, diced
  • 1/4 cup sweet onion, diced
  • 2 tablespoons butter
  • 2 tablespoons olive oil
  • 2 tablespoons all purpose flour
  • 2/3 cups chicken stock
  • 1/3 cup milk
  • 1/4 cup dry white wine
  • 2 tbsp fresh sage, chopped
  • 1/4 teaspoon fresh thyme, chopped
  • 1/4 teaspoon fresh rosemary, chopped
  • 1/2 teaspoon ground cinnamon
  • 1/4 cup shredded parmesan
Directions
  1. Melt butter in a medium saucepan over medium heat. Add olive oil and stir to combine fats.
  2. Add shallot and onion to pan and cook until translucent.
  3. Reduce heat to medium low and sprinkle in flour. Stir to combine with the onions and cook 2-3 minutes to thicken.
  4. Pour wine into saucepan. Return heat to medium and bring to a low boil. Allow to simmer about 2 minutes to cook out the alcohol.
  5. Add pumpkin puree, stock, and milk to saucepan. Stir to break down the lumps from the puree.
  6. Bring sauce to a boil again. Reduce heat to maintain a  simmer and cook 5-8 minutes.   If sauce is too thick, add more stock a few tablespoons at a time.
  7. Use a stick blender to blend all the ingredients and break down the onions and puree lumps to create a smooth sauce.
  8. Add chopped herbs, cinnamon, and Parmesan to the sauce. Stir or use your stick blender to combine and simmer 2-3 minutes. Taste and season with salt and pepper and/or additional herbs/spices as desired.

Serve over long, flat pasta and topped with sauteed shitake mushrooms.

~Ruth

Spaghetti and Eggs

On the road agaaaaain, just can’t wait to get on the road agaainnnn.

Yup, folks, I am out of here yet again.  This time I am heading to Patuxent River Air Station  (more commonly known as PAX River) where I will be taking my last Defense Acquisition class required for my Level III Program Manager Certification.  Did I mention that this was originally a six month course that has been compressed in the past few years into just one month? Eeep!  After stressing  so much about the class and all the material I need to brush up on, I just recently  started thinking about the other stuff.  How do I pack for a month?  Then it was: Ack, what condition is the kitchenette going to be in?

The kitchen worries gave me a good anxiety attack for about half a day as I recalled my family’s recent trip to Spain.  Fully functional and equipped kitchen, but you never understand how basic “the basics” are until you don’t have them!  Salt, pepper, sugar, garlic, onions, stock…and  do you know how hard it was trying to figure out which dairy container was real cream and not non-dairy creamer?  I thought I knew enough Spanish to figure that out, but apparently not lol.

Man, that trip to the grocery store was streeeeessful. So stressfull that we came back to the apartment only to realize we no complete meal to make.  We had just wanted to get out of that Spanish version of a  super Wal Mart (The traffic alone was worse than Christmas at Tyson’s Corner if you can believe it).  Luckily, my specialty is making a meal out of whatever odds and ends are on hand!  My dad had picked up a jar of basic marinara and a package of spaghetti.   For breakfast, my mom had grabbed a carton of eggs and what I’ll call Spanish-style bacon (It said it was bacon, but it was cut really thin, like procuitto and Iberico ham). Spaghetti and eggs it was! Kind of reminded me of when I used to douse my eggs in ketchup as a kid…but seriously, why didn’t anyone pick up any veggies??? Ah, well!

Here’s a much nicer version of the dish…but I still forgot the veggies!


Spaghetti and Eggs

Ingredients

serves 2

  • whole wheat spaghetti
  • 2 eggs
  • 4-5 Roma tomatoes, diced
  • 3 large garlic cloves, minced
  • 1 large shallot minced
  • 1/3 cup loose basil leaves, chopped
  • 1 can tomato puree (10.75oz)
  • 1 tbsp balsamic vinegar
  • 2 strips bacon, chopped
  • 2 tbsp olive oil

Directions

  1. Cook spaghetti according to package directions
  2. Pour olive oil in a large pan and turn heat to medium high
  3. Add shallots and garlic to heating oil until fragrant
  4. Add tomato sauce to pan and stir until shallots and garlic are mixed well
  5. Add diced Roma tomatoes and bring to a simmer
  6. Stir in balsamic vinegar, and season with salt and pepper if desired. Bring back to a simmer and allow to cook for about 5 minutes
  7. Add in chopped basil, stir, and set sauce aside
  8. Heat a small frying pan over medium high heat.  When hot, add the chopped bacon. (*Be careful! Splattering grease hurts!) Don’t worry about adding oil, because the bacon will render
  9. Fry bacon until crispy, then remove from pan and drain on a paper towel
  10. Crack one egg into the hot bacon grease. It will start to bubble right away
  11. Cook egg until white is solid. After you reach this stage, cook until yolk is set to your liking
  12. Gently flip egg and cook on the other side 30-45 seconds. Place on a paper towel lined plate until ready to plate
  13. Repeat steps 9-11 with the second egg
  14. To serve, add spaghetti to plate and pour tomato sauce over the pasta. Top with one egg and more sauce if desired. Garnish with the fried bacon bits and chopped basil


~Ruth

Aioli From Scratch…A.K.A. the Hard Way!

In a few hours, my friends, I will be on a bird headed to Spain for a vacation with my family. Now I have been racking my brain for an edition of the Let’s Get Saucy series Emilie introduced recently that aligned somewhat with this trip. Like wedding dresses, your first idea is usually your best. I had initially thought of this aioli recipe until I found out that this saucy condiment actually originates in Provence, France, not Spain. You see, the first time I came across aioli was in a Spanish tapas cookbook, which is why I thought it was Spanish. Then, as Emilie and I were preparing the Havuç Köftesi, I thought that though the sauce’s origins are Provence, olive oil and garlic are quintessential Mediterranean ingredients. I am heading to the Mediterranean coastline of Andalusia, so yes, aioli does work very well! Yippee!

I am sure that with today’s food culture, aioli is not completely new to most of you as at its heart it is a garlicky mayonnaise. Many “aioli” recipes I have come across actually build upon store bought mayonnaise by adding flavorings like spices and herbs. I cannot blame anyone for this tactic. You see, aioli is not easy to make. The ingredients and steps are simple looking, but they often over look the most important parts: patience, patience, patience…and if you do not have a food processer you’ll need strong arms, too! I have only completely successfully created aioli once in my life, which happens to be what you will see below. Many of my creations have been soupier, like the one pictured here. They emulsified enough not to be broken but lacked the true thickness of an aioli. Think consistency of yogurt in those cases.

Well, now it’s your turn and it’s also time for me to finish packing!

Basil Aioli

makes about a 1/2 cup

Ingredients

  • 3 cloves fresh garlic
  • 1 egg yolk, room temperature
  • pinch sea salt
  • 1/2 cup extra virgin olive oil
  • 1/4 fresh basil leaves, chopped
Directions
  1. Peel garlic and slice open to see whether the cloves have started to germinate. If so, remove and discard the green parts.
  2. Using the side of your chef’s knife, crush the garlic cloves. Once crushed, finely chop the crushed cloves. Repeat chop, crush, chop, crush until a paste forms.
  3. Place garlic paste in a heavy, large bowl (I started out in a small bowl and quickly switched once the whisking began!). Add egg yolk and pinch of salt to the bowl.
  4. Now, very, very, very…VERY slowly, begin drizzling the olive oil in as you whisk, whisk, whisk to combine and emulsify the ingredients. **Slowly adding the olive oil in is key to making this work. Adding too much, too fast will leave you with an oily, eggy soup. Ick! If you like, what I did after my first attempt resulted in the soupy version, was drizzle in a little, whisk, drizzle in a little more, whisk. I’ll warn you now, you’re arms are going to get a niiiiice workout!**
  5. Once your aioli is nice and thick, add the chopped basil and stir.
  6. Serve with toasted baguette slices, with your favorite dipping snacks, or as a replacement in your sandwiches and chicken salads in place of regular mayonnaise.

~Ruth

Let’s Get Saucy: Pistachio Sauce with Havuç Köftesi

As a counter point to my post on Monday about restaurant disappointment, I want to share with you my version of one of my top 10  favorite restaurant dishes ever. As a bonus, it even fits into my “Let’s Get Saucy” series because, to me, the best part of the dish is the sauce.  But, first, let me tell you a story.

My favorite restaurant in D.C. is a José Andrés restaurant called Zaytinya. It serves up an amazing pom filli cocktail and dozens of decadent Mediterranean inspired mezze from lamb and octopus to roasted Brussels sprouts and spanakopita, as well as a killer bottomless fresh pita basket (for sopping up all of the delicious sauces) and the best hummus I have found within the city limits. Seriously, I fell in love with this place the minute I took my first paralegal mentee here for lunch in 2005 and have been enamored ever since.

On that first visit, on the recommendation of my co-worker and fellow mentor (now a good friend) we ordered the havuç köftesi – carrot fritters accompanied by the most delectably amazing pistachio sauce ever. Ever. After that first taste, I made sure to order it every time I went. I’d let others at the table pick anything they want, but I insisted that these delicious carroty bites be included on the list. Until one day, in early 2009 when I looked down at the menu, aghast to find they weren’t there. I was crest fallen, but luckily I didn’t have to suffer too long, as later that year I moved to Ann Arbor for 2 years of graduate school. With over 500 miles between me and Zaytinya, the feeling of loss was greatly mitigated. Except, of course, when I brought friends here during spring break trips and summer internship visits only to still be greeted by this glaring hole in the menu.

Zaytinya’s Havuç Köftesi

Until last month, when I went to Zaytinya for the first time since moving back east. As I perused the menu, I excitedly babbled away about my love of the restaurant to my friend, who had yet to sample the delicious fare. Suddenly, I stopped mid-sentence. What was that I spied? Havuç Köftesi!!! My heart nearly stopped in my chest. When the waiter came by, I’m pretty sure my excitement was glaringly obvious as I excitedly squeaked (yes, squeaked) “you have havuç köftesi on the menu again!” He laughed and said that it had only recently be added back on the menu. The waiter and I quickly bonded as I spoke of my deep love of the pistachio sauce and failed attempts to make it myself. Halfway through our meal, our waiter stopped back by our table and with a conspiratorial wink, left me the recipe for the pistachio sauce written by the chef.

Jackpot! Sure the recipe was hastily scribbled by the very busy chef of one of D.C.’s most popular restaurants. Sure, it contained no measurements or real instructions save two lines about adding the water first and emulsifying the oil at the end. But it was the recipe, and it was mine!

With the quickly written recipe in hand, Ruth and I recently set about making the pistachio sauce and used several recipes for havuç köftesi from across the web to create our own version of the carrot fritters. Considering I forgot to buy the pine nuts and mint for the havuç köftesi, I think our final dish turned out great and will certainly hold me over until my next rip to Zaytinya. Will I continue to order the havuç köftesi every time I go to Zaytinya? Yes. Should you come to D.C. (be sure to say hi!) and go to Zaytinya to try it? Double yes. But in the meantime, enjoy!

Pistachio Sauce

1 Vidalia onion
1 cup dry roasted, unsalted pistachios
3/4 cup parsley, roughly chopped
Juice of one lemon
Just over 3/4  cup water (14 tablespoons to be exact), or more for a thinner sauce
Salt and pepper
5 tablespoons good olive oil, plus more for roasting the onion

1)     Peel a large Vidalia onion in half, place on a large piece of tin foil and drizzle with olive oil. Wrap tightly in the tin foil and roast in an oven preheated to 325°F. You want the onion to be soft, almost caramelized, so low and slow is the way to go. I left my onion in the oven for nearly 45 minutes, but started checking it frequently after 30 minutes. Set aside and let cool (this step can be done a day or two in advance, with the onion stored in the fridge).

2)      Add pistachios, juice of one lemon, a generous pinch of salt and of pepper, the roasted onion, and ¼ cup of parsley to a food processor (or in our case, use a hand blender because the  food processor is too small). Process together until the mixture begins to resemble a paste or nut butter.

3)      Add about half of the water and the rest of the parsley and process until smooth.

4)      Stream the rest of the water into the sauce while continuing to process.  Add more water, a tablespoon at a time, if a thinner sauce is desired. Remember, though,  you will be adding olive oil at the end so stop just before you reach your desired consistency. (We made the sauce a bit thick – think about the consistency of Greek yogurt. I wouldn’t have minded an additional tablespoon or two of water myself.)

5)      Once you are close to your desired consistency, stream in 6 tablespoons of good quality olive oil and emulsify well.

6)      Serve room temperature or chilled.

Havuç Köftesi

1 pound bag of baby carrots
1/4 cup finely chopped fresh dill
1/4  cup finely chopped fresh parsley
6 dried apricots, finely diced
4 large cloves garlic, diced
1/2 cup bread crumbs
1 large egg
Salt and pepper, to taste
Dusting mixture (2 tbsp flour, 3 tbsp bread crumbs, salt and pepper)
(Included in most recipes, but we didn’t have: finely chopped mint (about 1/4 cup) and 2-3 tablespoons pine nuts)

1)      Bring a large pot of water to a boil. Once boiling, salt generously and boil carrots until soft.

2)      While the carrots are boiling, chop parsley and dill. Dice apricots and garlic.

Mincing garlic

Chopping the parsley

The apricots and chopped herbs were almost too pretty to eat.

3)      Drain carrots and mash. Place in fridge to cool for about 30 minutes.

4)      Mix in herbs, garlic, salt and pepper, and apricots. Add egg and bread crumbs.

5)      Shape a generous tablespoon of carrot mixture into an oblong shape. Roll in dusting mixture.

6)      Heat a quarter inch layer of olive oil over medium-high heat, carefully place the havuc koftesi in the oil and cook until crispy on all sides.

7)      Place on paper towel lined plate or tray.

8)      Spread pistachio sauce on a plate and arrange hot fritters over the sauce to serve.

Let’s Get Saucy: Garlic White Pizza Sauce

Pizza is awesome. Go ahead, try and tell me I’m wrong. Warm crust, cheese, tangy delicious tomato sauce, and a perfectly matched group of toppings. It’s also an incredibly easy and gratifying meal to make yourself. Tomato based pizzas are particularly simple, all you need is a can opener and an 8oz can of garlic-basil tomato sauce. If you are craving something different, like a white pizza, things get a bit more difficult. Until now.

As part of the “Let’s Get Saucy” series, try this recipe for garlic white pizza sauce and immediately expand your home pizza options. Because the sauce is so simple in its composition – its really just an slightly thicker béchamel with garlic and red pepper – it is vital that you pay attention when making your roux. If you don’t cook it long enough your sauce will have a starchy floury taste. If you cook it too long and let it brown not only will your pizza sauce have a burned or charred taste, but it will have a brown color to it. Cook the roux at low or medium-low heat and don’t take your eyes off of it.

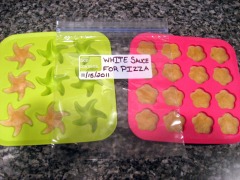
The recipe makes enough for about 3 pizzas, so freeze the leftovers if you are only making one Italian pie.

White Garlic Pizza Sauce

2-3 heads of garlic
2 tablespoons olive oil
1/2 teaspoon red pepper flakes, more to taste
1.5 tablespoons flour
1 cup milk
Salt and pepper to taste

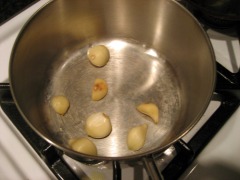
1)      Peel garlic cloves and heat a dry pan over medium heat. Place peeled cloves in pan and roast, turning frequently to avoid burning. Garlic is done when it is soft (although not as soft as oven roasted garlic) and fragrant. Set garlic aside.

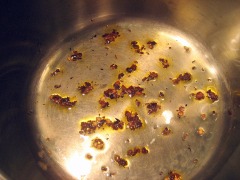
2)      Add oil and red pepper flakes to pan, heat for about 15-30 seconds over low heat.

 Add flour and cook for 1-2 minutes. Stir constantly and do not let flour mixture brown or color.

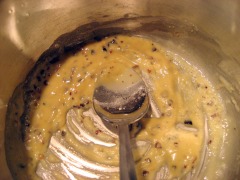
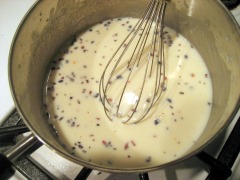
3)      Add milk a little and a time, whisking constantly to avoid lumps.

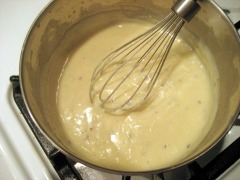
Bring to a simmer, stirring frequently, until mixture is about the thickness of a canned alfredo sauce.

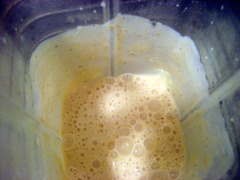
4)      Place cooked garlic cloves and béchamel sauce in a blender and purée until smooth.

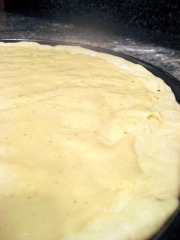
5)      Gather your favorite toppings and pizza dough (or use the recipe at the bottom of this post) to make a fabulous pizza. Spread about a quarter cup to a third a cup of the sauce over a 14-inch pizza

Hidden Space

Pizza bianca

Let’s get Saucy: Gorgonzola Sauce

I think everyone needs a few good multi-dimensional sauces recipes in their repertoire. Sauces that are easy to whip up but have a pretty big wow factor. With that in mind, I’ve decided to do a mini-series of sauce and dip recipes that can compliment several types of dishes. I already have a few recipes waiting in the wings, but I’m also going to challenge myself to try some new sauces. If we are lucky I’ll even make a real Hollandaise sauce. I won’t lie, that one intimidates me the most…

Also, I should apologize for the horrible pun that is our series title, but I’m a huge dork so hopefully you will humor me.

Gorgonzola Cream Sauce over gnocchi & asparagus

I want to start this series with a standard sauce of mine, inspired by a Trader Joe’s frozen meal. I started eating the Gorgonzola and gnocchi in grad school as a quick meal on the nights I was teaching when there wasn’t time between classes and office hours to think about food. I thought the ratio of sauce to gnocchi, even with the addition of veggies, was too high, so I would take out about a third of the chips and re-freeze them. With a little more Gorgonzola, the sauce was perfect on asparagus, a juicy medium-rare fillet mignon, and pasta with sautéed mushrooms. Still, I was doing quite a bit to doctor the sauce and bring it up to my standards – more pepper, a little garlic, more Gorgonzola – with all that work, it became clear making it myself was my best option.

Once I mastered the sauce, I started freezing it, just like I did the store bought stuff, so that it was ready for a quick week night meal or a surprise dinner guest I wanted to impress a little. I like using these silicone IKEA ice cube trays. Not only are they smaller than many trays I have seen, but the silicone makes removing the sauce once frozen easier. Once they have frozen solid, I remove them from the tray and place them in a labeled Ziploc baggie (by-the-way, I use this method for tons of things, including a white garlic pizza sauce I plan on sharing.)

 Gorgonzola Cream Sauce

2 tablespoons butter
2 large garlic cloves, finely diced
Freshly ground pepper
1 tablespoon flour
1.5 – 2 cups heavy cream (or milk)
1/4 cup shredded Parmesan
8 -16 ounces Gorgonzola

1)      Melt butter in a small sauce pot over low heat (in fact I use low heat and hold the sauce pot about an inch above the flames, to prevent any burning). Once it has all melted, increase flame to medium-low and heat for 20 seconds before adding garlic.

2)      Cook garlic in butter for 1 minute, until fragrant. Add pepper.

3)      Add flour and mix well with butter. Sauté for 2 minutes, stirring constantly to keep it from browning.

4)      Using a whisk add heavy cream. Start with 1/4 cup and whisk vigorously to avoid clumps. Add at least 1.5 cups total, and whisk frequently. Continue cooking for about 5-8 minutes. As the sauce begins to thicken you may decide you want a thinner sauce. If so add more cream a quarter cup at a time, waiting 2 minutes between additions (I have never used more than 2 cups of milk, but I like thick sauce).

5)      Once you’ve reached your desired thickness, add Parmesan and stir until fully melted into sauce.

6)      Remove from heat and add at least 8 ounces of Gorgonzola stirring until melted. Taste, if you want add more cheese. I like very strong flavor so I usually add about 12-16 ounces.